Tables, Images & More
Last updated
Tables, images, code blocks, equations, diagrams, horizontal lines, a table of contents, and footnotes are on the Insert tab of the ribbon. Put the caret where the content should go, then click a button. Inserting needs edit access to the document.
The Insert tab
Click Insert in the tab strip, or Insert on the Edit tab.

| Button | Inserts |
|---|---|
| Table | A table of the size you pick |
| Image | An image file from your computer |
| Divider | A horizontal line in one of seven styles |
| Code | A code block with syntax highlighting |
| Equation | A LaTeX equation on its own line |
| Diagram | A Mermaid diagram |
| Footnote, Endnote | A numbered note reference at the caret |
| Page # | A page number field |
| Contents | A table of contents built from your headings |
Tables, images, code blocks, equations, and diagrams go below the paragraph that holds the caret. Dividers, tables of contents, and page breaks go at the caret and split the paragraph there. Put the caret on an empty line first. The right-click menu also has an Insert submenu with Page Break, Horizontal Line, section breaks, and Table of Contents.
Insert a table
- Click Table. A grid opens.
- Move the pointer over the grid. The label under it shows the size as columns x rows. The grid grows as you move toward its edge, up to 10 x 10.
- Click to insert the table.
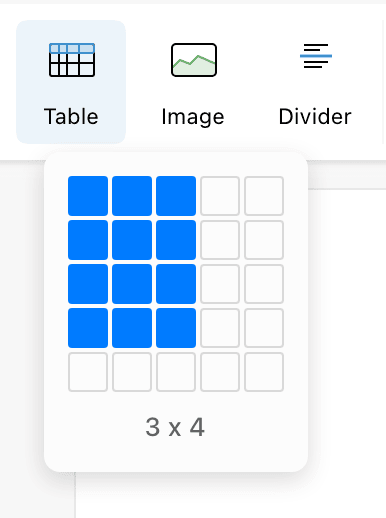
Click a cell to type in it. A cell can hold formatted text, lists, and links.
| Key | Action |
|---|---|
| Tab | Move to the next cell. In the last cell, add a row. |
| ⇧Tab | Move to the previous cell |
To delete a table, select from the line above it to the line below it and press Backspace. Tables you paste from a web page or another document become Revise tables. The agent can also build tables (see inserting content with the agent).
Rows, columns, and merged cells
Right-click a cell to see the table commands. Row and column commands are under Table Structure.
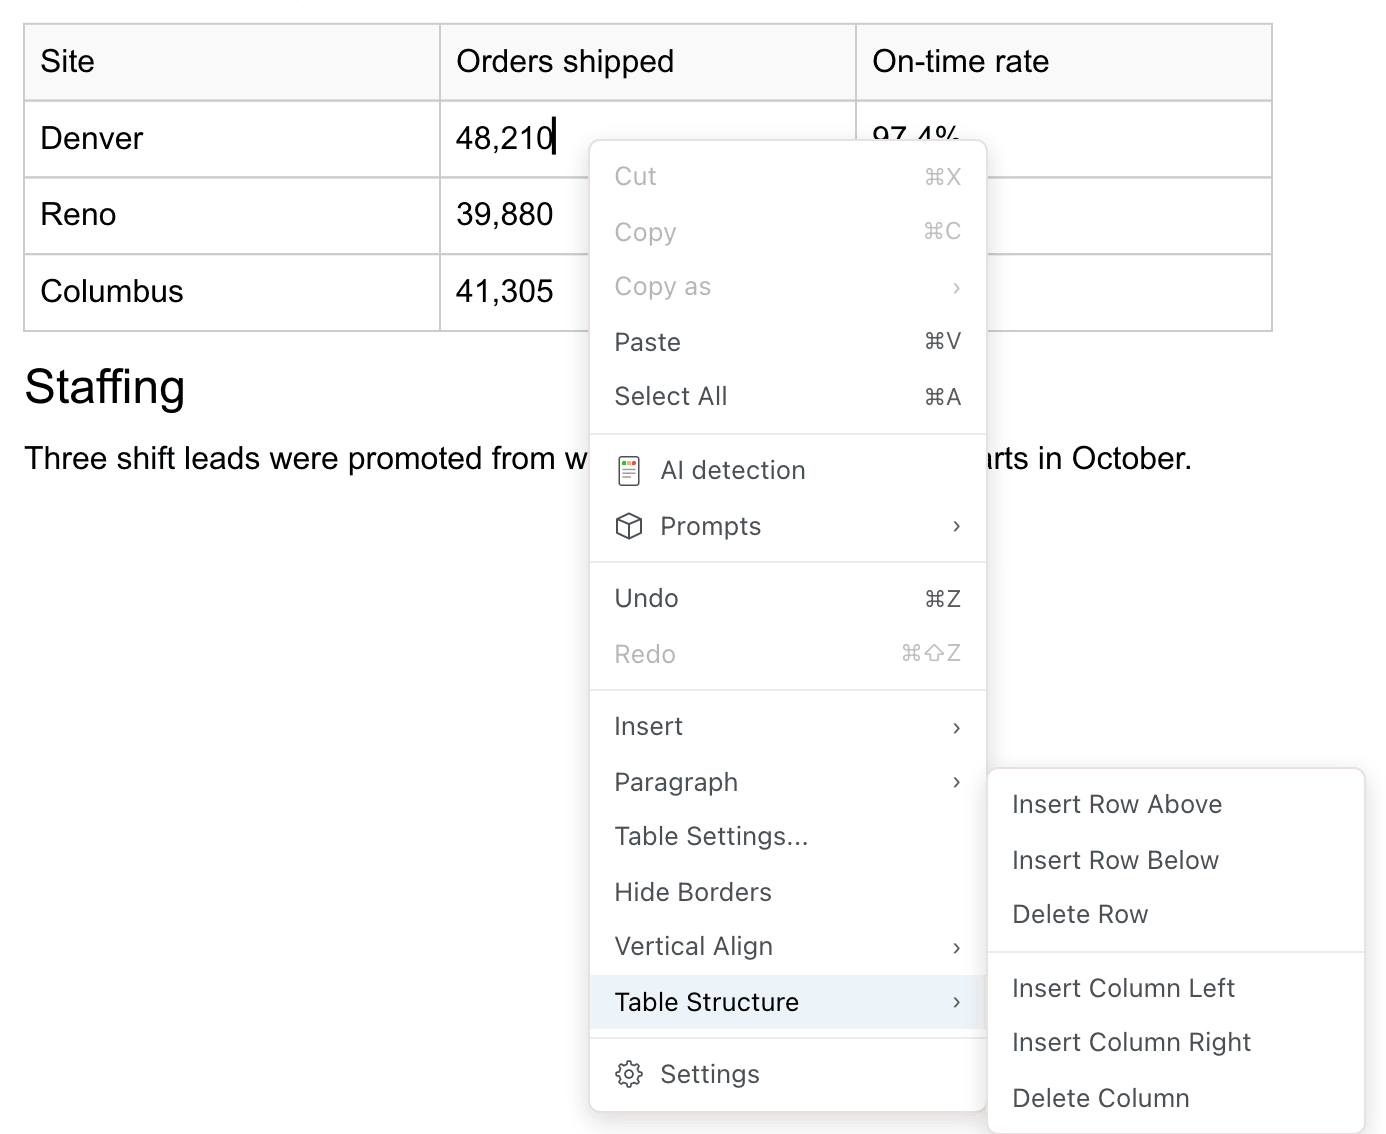
| Command | Action |
|---|---|
| Insert Row Above, Insert Row Below | Add an empty row |
| Delete Row | Remove the row. Hidden when the table has one row. |
| Insert Column Left, Insert Column Right | Add an empty column |
| Delete Column | Remove the column. Hidden when the table has one column. |
| Merge Cells | Join the selected cells into one |
| Unmerge Cells | Split a merged cell back into its original cells |
| Vertical Align | Place cell text at the Top, Middle, or Bottom of the cell |
To merge cells, drag across them to select them, then right-click and choose Merge Cells. The command appears only when more than one cell is selected. Unmerge Cells appears when the selection includes a merged cell.
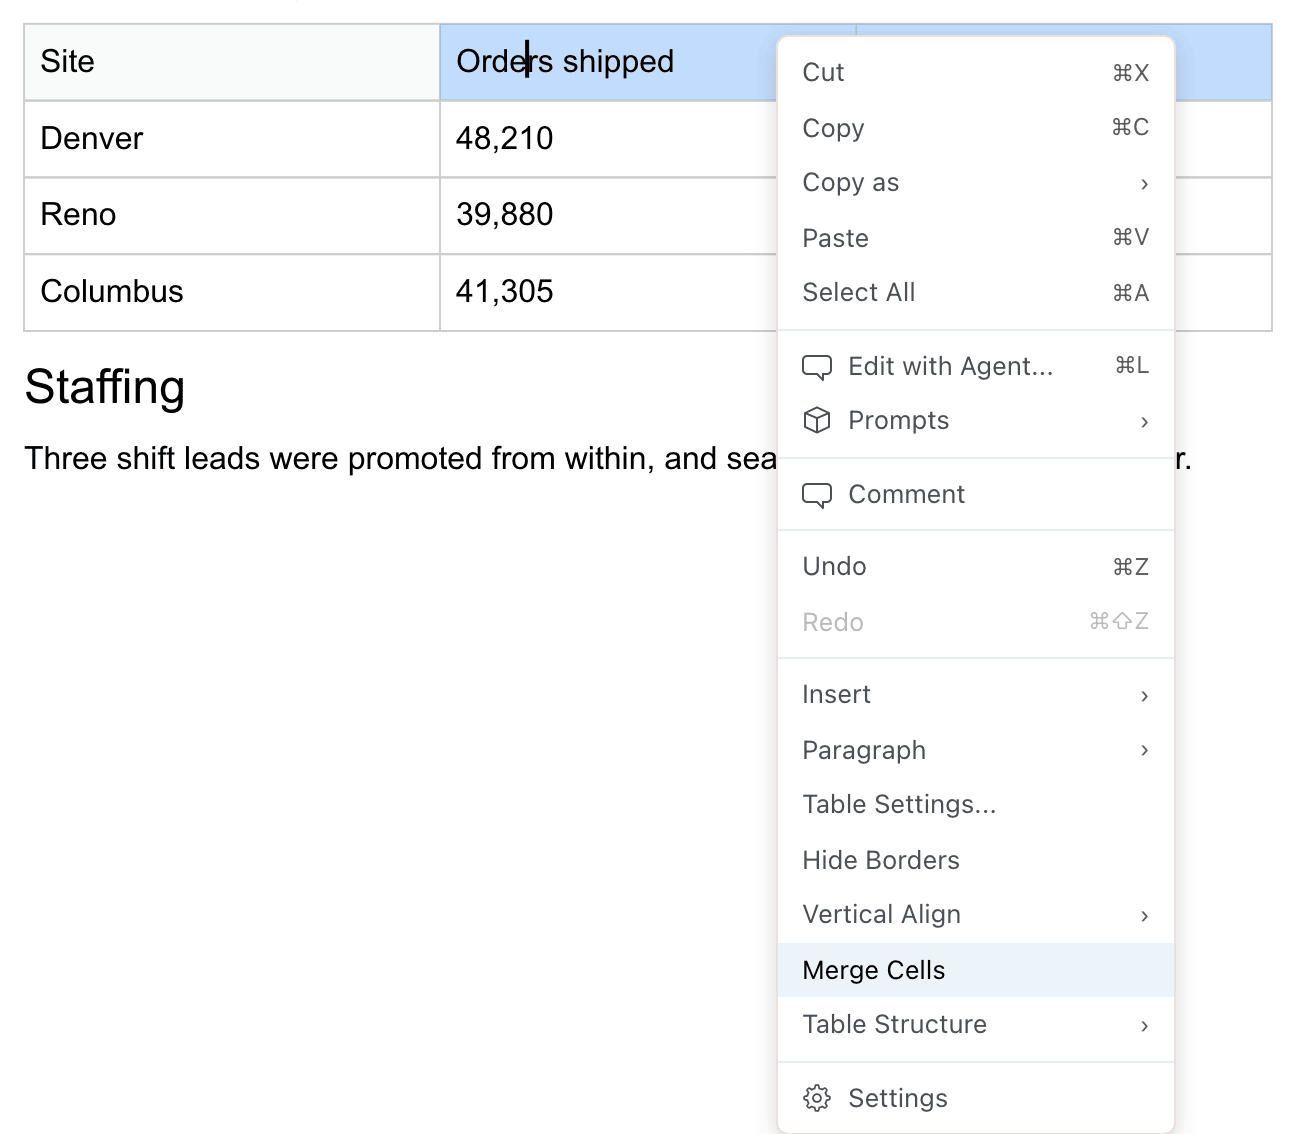
Table borders, header row, and width
Right-click a cell and choose Table Settings.... The settings apply to the whole table when you click Apply.
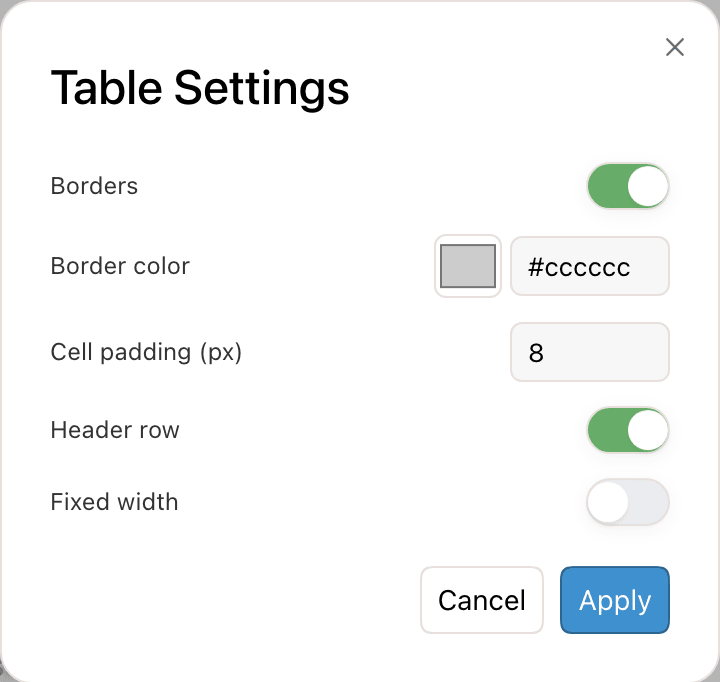
| Setting | Effect |
|---|---|
| Borders | Show or hide the cell borders. Hide Borders and Show Borders in the right-click menu do the same. |
| Border color | A color picker and a hex field. The default is #cccccc. |
| Cell padding (px) | Space inside each cell, 0 to 64 pixels. The default is 8. |
| Header row | Shade the first row. In paged mode, the header row repeats at the top of each page the table continues on. It does not repeat if one of its cells is merged with the row below. |
| Fixed width | Set the table width in pixels, from 100 to 3000. When off, the table fills the text width. |
To change column widths, drag the border between two columns. A column can't be narrower than 5% of the table. Drag the table's right edge to change the table width. A table is never wider than the text area.
Revise has no control for cell shading. Shading in pasted tables, Word files, and tables the agent writes is kept and exported.
Insert an image
| Method | Where the image goes |
|---|---|
| Click Image on the Insert tab and choose a file | Below the paragraph with the caret |
| Drag an image file onto the page | Where the drop line shows while you drag |
| Paste a copied image, such as a screenshot | At the caret |
Revise uploads the file and inserts the image when the upload finishes. PNG, JPEG, GIF, and WebP files up to 10 MB work. An image wider than the text area is scaled down to fit. Uploading does not need an account.
To save an image to your computer, right-click it and choose Save Image. To delete an image, click it and press Backspace.
Resize and align an image
- Move the pointer over the image. A frame and a square handle appear in its bottom corner.
- Drag the handle. The image keeps its proportions. Hold Shift while dragging to change the height on its own.
To align an image, click it, then click Align Left, Align Center, or Align Right on the Edit tab. On a right-aligned image, the handle is in the bottom left corner. An image can't be smaller than 32 pixels on a side.
Revise has no field for alt text. Alt text from imported Word and HTML files, and alt text the agent writes, is kept and included in exports. For charts, SmartArt, and EMF images in Word files, see images and objects in Word files.
Images added by the agent
When the AI agent adds an image from the web, Revise first copies it to its own storage. The copy keeps working if the original site removes the image or blocks other sites from showing it. If an image can't be copied, the agent's change is not applied. The document keeps the original address as the image's source. For everything else the agent can add, see inserting content with the agent.
Code blocks and syntax highlighting
Click Code to insert a code block. With paragraphs selected, Code turns them into one code block. Code blocks use a monospace font, keep every space, and wrap long lines. Tab inserts a tab character. For code inside a sentence, use inline code.

While the caret is in a code block, a language menu shows in its top right corner. The language sets the syntax colors. Common languages are listed first: JavaScript, TypeScript, TSX (React), Python, Java, Go, Rust, Mermaid, and LaTeX. The rest follow in alphabetical order, from Bash / Shell to Zig. A new code block takes the language of the nearest code block in the document. If there is none, it takes the language you chose last, or JavaScript.
Choosing Mermaid or LaTeX turns the block into a diagram or an equation. Pasted Markdown with fenced code (```python) becomes code blocks in the fence's language (see pasting content).
Equations
Click Equation to insert an equation on its own line. It starts as E = mc^2. Edit the LaTeX source in the top box. The rendered equation below it updates as you type. The <> button in the corner of the rendered equation hides or shows the source box.
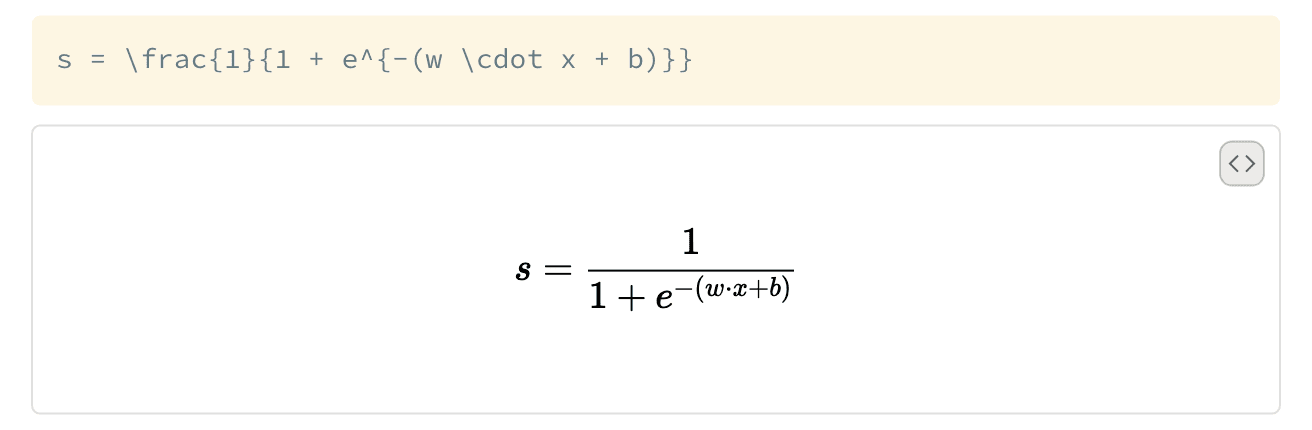
For a formula inside a sentence, select its LaTeX source and choose Inline LaTeX from the More Formatting menu (see text styles). Put the caret in the formula to edit its source in the Inline LaTeX card in the margin.

Pasted Markdown turns $$ blocks into equations and $...$ into inline formulas. For how equations convert to and from Word, see equations in Word files.
Mermaid diagrams
Click Diagram to insert a Mermaid diagram. It starts as a sample flowchart. Edit the Mermaid source in the top box. The diagram below it redraws as you type. The <> button hides or shows the source, as on equations.
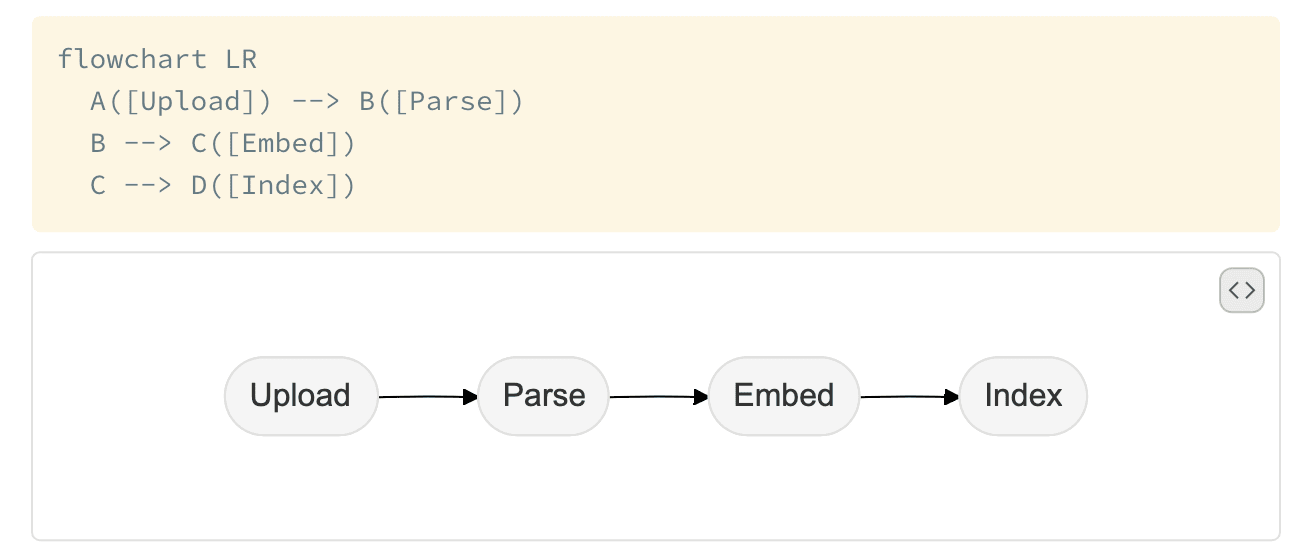
Mermaid diagram types such as flowcharts, sequence diagrams, and Gantt charts all work. Diagrams follow the light or dark theme and are included in PDF exports. Pasted Markdown with a ```mermaid fence becomes a diagram.
Horizontal lines
Click Divider and choose a style: Thin, Thick, Double, Dashed, Dotted, Stars, or Diamonds. Horizontal Line in the right-click Insert submenu adds a thin line.
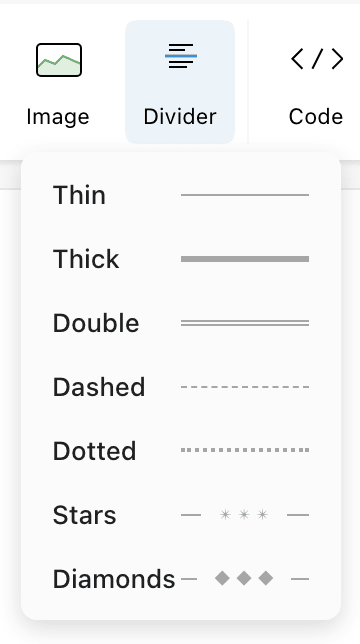
You can also type one of these on an empty line and press Enter (see formatting as you type). Typed lines don't convert in Suggesting Mode.
| Type | Style |
|---|---|
--- | Thin |
___ | Thick |
=== | Double |
*** | Dotted |
-**- | Stars |
-<>- | Diamonds |
Revise stores a horizontal line as an empty paragraph with a bottom border, as Word does, so lines round-trip through Word files.
Table of contents
Put the caret on an empty line and click Contents. The table of contents lists Heading 1 to Heading 3 with page numbers and dot leaders. It updates as you add, rename, or remove headings. Double-click an entry to jump to its heading.

In a document with no headings, it shows a line asking you to add some. Set headings with the paragraph style menu (see headings). The table of contents uses the font of the paragraph where you insert it.
Footnotes and endnotes
- Put the caret where the note number should go.
- Click Footnote or Endnote. A superscript number appears, and a card opens in the margin.
- Type the note text in the card.

| Footnotes | Endnotes | |
|---|---|---|
| Numbering | 1, 2, 3 | i, ii, iii |
| Note text in paged mode | Bottom of the page with the number | End of the document |
| Note text in pageless mode | End of the document | End of the document, after the footnotes |
Click a note number to open its card again. Go to note (the arrow) moves the caret into the note text, where you can edit notes longer than one paragraph. Remove note (the trash can) deletes the number and the note. Numbers update when you add, move, or delete notes. A document can have both kinds. Footnotes and endnotes round-trip through Word files. The agent can add notes too (see footnotes from the agent).
Page numbers and page breaks
Page # inserts a page number field at the caret. The field shows the number of the page it is on, so it belongs in a header or footer.
A page break starts a new page. To insert one:
| Method | Where |
|---|---|
| ⌘Enter | Keyboard |
| Page Break | Layout tab |
| Insert, then Page Break | Right-click menu |
Headers, footers, page number formats, and section breaks are covered in Page Layout. It also shows how page breaks appear.
Links
To add a link, select text and press ⌘K or click Create Link on the Edit tab. Editing and removing links is covered in Editing & Formatting.
Requirements and limits
| Item | Limit |
|---|---|
| Account | Not required |
| Access | Edit access to the document |
| Table size from the grid | Up to 10 x 10. Add rows and columns afterward. |
| Table width | 100 pixels up to the text width |
| Image files | PNG, JPEG, GIF, or WebP, up to 10 MB each |
| Image size | 32 pixels on a side up to the text width |
| Table of contents | Heading 1 to Heading 3 |